So, you’ve found a damp patch on your sports hall floor? Bummer. Water damage on sprung timber floors can be a real headache, but don’t panic just yet. We’re going to walk through how to sort out localised water damage and get your court back in shape. It’s not always as bad as it looks, and with a bit of know-how, you can often fix it yourself. Let’s get this sorted.
Key Takeaways
- First off, figure out where the water came from and how much of the floor it’s affected. This helps you know what you’re dealing with.
- Get that water out and the area dry as quickly as possible. Open windows, use fans – whatever it takes to get air moving.
- Swollen boards might need some time to shrink back. If they’re really damaged, you might have to swap them out for new ones.
- Once everything is dry and any new bits are in, give the whole area a good sand and finish to make it look like new again.
- If the damage is massive, you suspect mould, or the structure seems dodgy, it’s probably best to call in the pros to repair water damaged sports floor properly.
Assessing The Water Damage
Right, so you’ve spotted some dampness on your sports floor. Before you panic, let’s take a good look at what’s going on. It’s all about figuring out the scale of the problem and where it came from.
Identifying The Source Of The Water
First things first, where did the water actually come from? This is super important because if you don’t fix the leak, you’ll just be back here again. Was it a leaky pipe in the wall? A burst radiator? Maybe rain getting in through a dodgy window seal or a roof issue? Sometimes it’s as simple as a spill from a water bottle during a game, but other times it’s more hidden. Pinpointing the origin is the first step to stopping more damage.
Determining The Extent Of The Damage
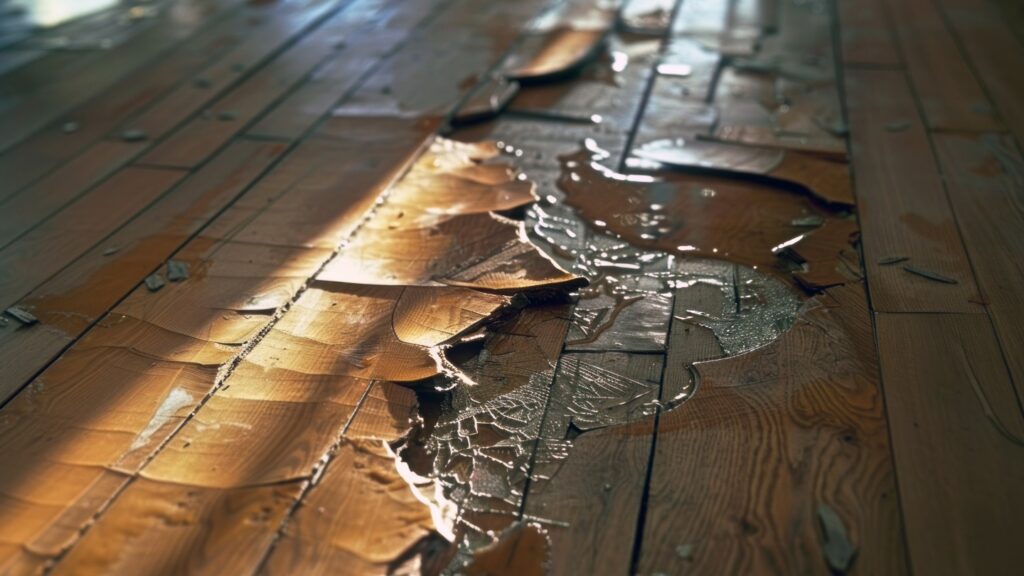
Once you know where it’s coming from, you need to see how far the water has spread. Is it just a small patch, or has it seeped under the floorboards? You might need to gently lift a few boards to check. Look for:
- Discolouration of the timber
- Warping or swelling of the boards
- Soft spots or a spongy feel underfoot
- Any signs of water stains on walls or skirting boards nearby
Sometimes, water can travel further than you think, especially under the floor. A moisture meter can be a lifesaver here, giving you a clearer picture of how damp things really are beneath the surface.
Checking For Mould And Mildew
This is the bit nobody likes to think about, but it’s really important. Damp environments are a breeding ground for mould and mildew. Give the affected area a good sniff – does it smell musty? Look closely at the edges of the boards, in any gaps, and on any nearby walls. Even a small amount of mould can be a health hazard and can spread quickly. If you see or smell anything suspicious, it’s a sign that the area needs thorough drying and possibly more intensive cleaning.
Remember, water damage isn’t just about the wood itself. It’s about what can grow in the damp and how it affects the whole structure. Getting a clear picture now saves a lot of hassle later.
Immediate Steps To Take
Right, so you’ve spotted the damp patch and the smell of mildew is starting to creep in. Don’t panic, but don’t hang about either. Getting on top of water damage quickly is the name of the game. The faster you act, the less chance the water has to really do some serious damage.
Drying Out The Area
First things first, you need to get that moisture out. If it’s just a small spill, a good mop and some towels might do the trick. For anything more significant, you’ll want to bring in the big guns. Think dehumidifiers and industrial fans. You want to be moving as much air around the affected area as possible. The goal is to dry the timber and the subfloor underneath.
Removing Standing Water
If there’s actual water pooling on the surface, you’ve got to get rid of it pronto. For small amounts, buckets and sponges are your friends. If it’s a bit more serious, a wet vacuum cleaner is a lifesaver. Seriously, these things can suck up a surprising amount of water. Just make sure you empty it regularly and keep going until you can’t see any more puddles.
Ventilation Is Key
Once the bulk of the water is gone and you’ve got your drying equipment running, you need to think about airflow. Open up windows and doors if the weather permits. Use fans to create a cross-breeze. This helps to carry the moist air away from the floor and out of the building. Good ventilation is absolutely vital for preventing mould and helping the timber dry properly. You’re basically trying to speed up nature’s drying process.
Remember, even if the surface looks dry, there could still be moisture trapped underneath the boards or in the subfloor. Keep those fans running and the dehumidifiers working until you’re confident it’s properly dry.
Repairing The Timber Floor
Right then, the water’s gone, and the immediate panic has subsided. Now comes the nitty-gritty: fixing the actual floor. This is where things can get a bit fiddly, but don’t worry, we’ll take it step-by-step.
Dealing With Swollen Boards
So, you’ve got some boards that have puffed up like a pufferfish after a swim? This is pretty common. The wood’s soaked up water, and the fibres have expanded. The goal here is to get them back to their original shape as much as possible. Sometimes, if the swelling isn’t too bad and the wood is dried out properly, they might shrink back on their own. But often, you’ll need to give them a helping hand. You might find you can gently prise them apart a little once they’re dry, or even use a specialised wood filler designed for this kind of thing. If they’re really stubborn, you might have to accept a bit of a gap and plan to fill it later. It’s all about patience at this stage.
Replacing Damaged Sections
Sometimes, the damage is just too much for a simple fix. If boards are warped beyond repair, have started to rot, or are just looking a bit sad and splintery, it’s time to swap them out. This is where you’ll need to be a bit handy. You’ll want to carefully cut out the damaged section, making sure you don’t nick any surrounding good boards. Then, get some matching timber – this can be tricky, so try to find something as close in size and grain as you can. You’ll need to cut the new pieces to fit snugly into the gap. Then, it’s a case of gluing and nailing them in place. It’s not rocket science, but it does require a steady hand and a bit of precision.
Sanding And Refinishing
Once you’ve dealt with any swollen or replaced boards, you’ll likely have a floor that looks a bit patchwork. This is where sanding comes in. You’ll need to sand down the repaired areas to match the level of the existing floor. Start with a coarser grit sandpaper to get rid of any unevenness, then move to finer grits to get a smooth finish. After sanding, you’ll need to reapply the finish – whether that’s varnish, lacquer, or oil. This not only makes the floor look good again but also protects the wood. Matching the original finish is key to making the repair look seamless. You might need to do a test patch somewhere less visible first to get the colour just right.
Remember, even after repairs, the wood might behave a little differently. Keep an eye on it for a while to make sure everything settles in nicely. Don’t be surprised if you need to do a bit of touch-up work down the line.
Preventing Future Issues
Right, so we’ve hopefully sorted out that water damage. But wouldn’t it be great if we could stop it from happening again? It’s all about being a bit proactive, really. A bit of regular checking can save you a massive headache down the line.
Regular Inspections
This is probably the most straightforward bit. You don’t need to be a detective, just keep an eye on things. What should you be looking for? Well, think about the usual suspects:
- Check around windows and doors: Are the seals looking a bit tired? Any gaps where rain could sneak in?
- Look at the roof and gutters: Are they clear of leaves and debris? Blocked gutters can cause water to back up and find its way into places it shouldn’t.
- Inspect any external pipework: Any drips or leaks, even small ones, can over time cause problems.
- Don’t forget the inside: Keep an eye on areas near plumbing, like under sinks or around toilets, especially if they’re close to the sports floor.
A quick walk-around every few months can catch minor issues before they become major water woes.
Maintaining Drainage Systems
This ties in with inspections, but it’s worth its own mention. Your drainage system, both inside and outside, is there for a reason. If it’s not working properly, water has nowhere to go but where you don’t want it.
- Gutters and Downpipes: As mentioned, keep them clear. Leaves, moss, and general gunk can really clog things up. A simple hose down can often do the trick, or you might need to get in there with a trowel.
- External Drains: If you have drains around the building, make sure they aren’t blocked by soil or rubbish. Water pooling outside can seep into foundations.
- Internal Drainage (if applicable): Some sports halls might have internal drainage. Ensure these are clear and functioning as they should.
Addressing Leaks Promptly
This is the big one. If you spot a leak, don’t just think ‘oh, I’ll get to that later’. Later often turns into much, much worse.
The longer a leak is left, the more damage it can do, not just to the floor but potentially to the sub-structure and even the building itself. It’s a domino effect, really.
Whether it’s a leaky pipe under a sink, a faulty appliance, or a roof issue, get it sorted. Sometimes it’s a quick fix, like tightening a joint. Other times, it might mean calling in a plumber or a roofer. The cost of a prompt repair is almost always less than the cost of dealing with the aftermath of a neglected leak. So, be vigilant, and act fast when you see a problem.
When To Call In The Professionals
Right, so you’ve had a bit of a water mishap on your sports floor. You’ve done your best with the drying and maybe even swapped out a board or two. But sometimes, you’ve just got to admit defeat and get someone in who knows their stuff. It’s not a sign of weakness, honestly, it’s just smart. Trying to fix something beyond your skill level can often make things worse, and that’s the last thing anyone wants when it comes to a pricey sports floor.
Extensive Water Intrusion
If the water has really soaked in, like, a lot, it’s probably time to wave the white flag and call in the pros. We’re talking about situations where the water has gone deep into the subfloor, or large sections of the timber are visibly warped and buckled. It’s not just about the surface boards anymore; it’s about what’s happening underneath.
- Significant swelling: Boards are lifting noticeably, creating unevenness.
- Subfloor damage: You suspect the base layers beneath the timber are compromised.
- Long drying times: Even with good ventilation, the area feels damp days later.
Structural Concerns
Water damage isn’t always just about the wood. If you’re seeing signs that the water has affected the building’s structure, that’s a big red flag. Think about the joists, the supporting beams, or even the walls around the sports area. Rotting wood or weakened supports are serious business and need expert attention, pronto.
Don’t mess about with structural issues. It’s not just about the floor anymore; it’s about the safety of the whole space. Get a specialist in to check it out.
Complex Repair Requirements
Sometimes, the damage might look manageable, but the repair itself is tricky. Maybe you’ve got a really old, specific type of timber, or the layout of the floor is complicated. Trying to patch it up yourself could lead to a finish that just doesn’t match, or worse, creates new problems down the line. Professionals have the tools, the knowledge, and the experience to handle these fiddly jobs properly. They can source the right materials and make sure the repair is practically invisible and performs as it should.
If you’re unsure whether your sports hall floor needs a little TLC or a complete overhaul, it’s always best to get a professional opinion. Don’t guess when it comes to the safety and performance of your court. For expert advice and a free quote, visit our website today!
So, What’s the Takeaway?
Right then, dealing with water on your sports floor might seem like a big headache, but as we’ve seen, it’s often something you can sort out yourself if you catch it early. The key really is to act fast – don’t let that dampness sit around. Getting the area dry and then fixing up any bits that have warped or swelled is totally doable. It might take a bit of patience, and maybe a few trips to the hardware shop, but you can definitely get your floor back in good shape. If it’s a really bad situation though, or you’re just not feeling up to it, there’s no shame in calling in the pros. They’ve got the gear and the know-how to sort it out properly. Either way, a bit of quick action can save you a lot of bother down the line.
Frequently Asked Questions
How do I know if my sports floor has water damage?
Keep an eye out for any weird smells, like damp or mould. You might also see the wooden boards looking a bit puffy or uneven, like they’ve had a big drink! Sometimes, discoloured patches or even mould spots can show up too. Basically, if it looks or smells ‘off’, it’s worth checking out.
What’s the first thing I should do if I find water on the floor?
Right, first things first, you need to stop the water from getting any worse. Find out where it’s coming from and fix that leak pronto! Then, get rid of any puddles you can see. Think of it like mopping up a spill, but make sure you get as much water out as possible.
Can I just dry the floor with a hairdryer?
For tiny spills, maybe. But for anything more serious, a hairdryer isn’t going to cut it. You need good airflow. Open windows, use fans, maybe even a dehumidifier if you have one. The goal is to get air moving all around the damp wood to help it dry out properly and stop mould from setting up shop.
What if the wooden boards have swollen up?
Swollen boards are a bit tricky. Sometimes, if it’s not too bad, they might shrink back down as they dry. But if they’re really puffy, you might have to get rid of the worst ones and put in new bits of wood. It’s like replacing a damaged puzzle piece.
Do I need to sand the floor after it’s dry?
Often, yes. Once everything is completely dry and any damaged bits are fixed or replaced, you’ll probably need to give the floor a good sand. This smooths out any rough patches and gets it ready for a new coat of sealant or varnish to protect it.
When is it too much for me to handle myself?
If the water has soaked through a really big area, or if you suspect it’s gone into the structure underneath the floor, it’s time to call in the experts. Also, if you see loads of mould or the wood looks like it’s crumbling, get a professional to take a look. They have the right tools and know-how for the serious jobs.