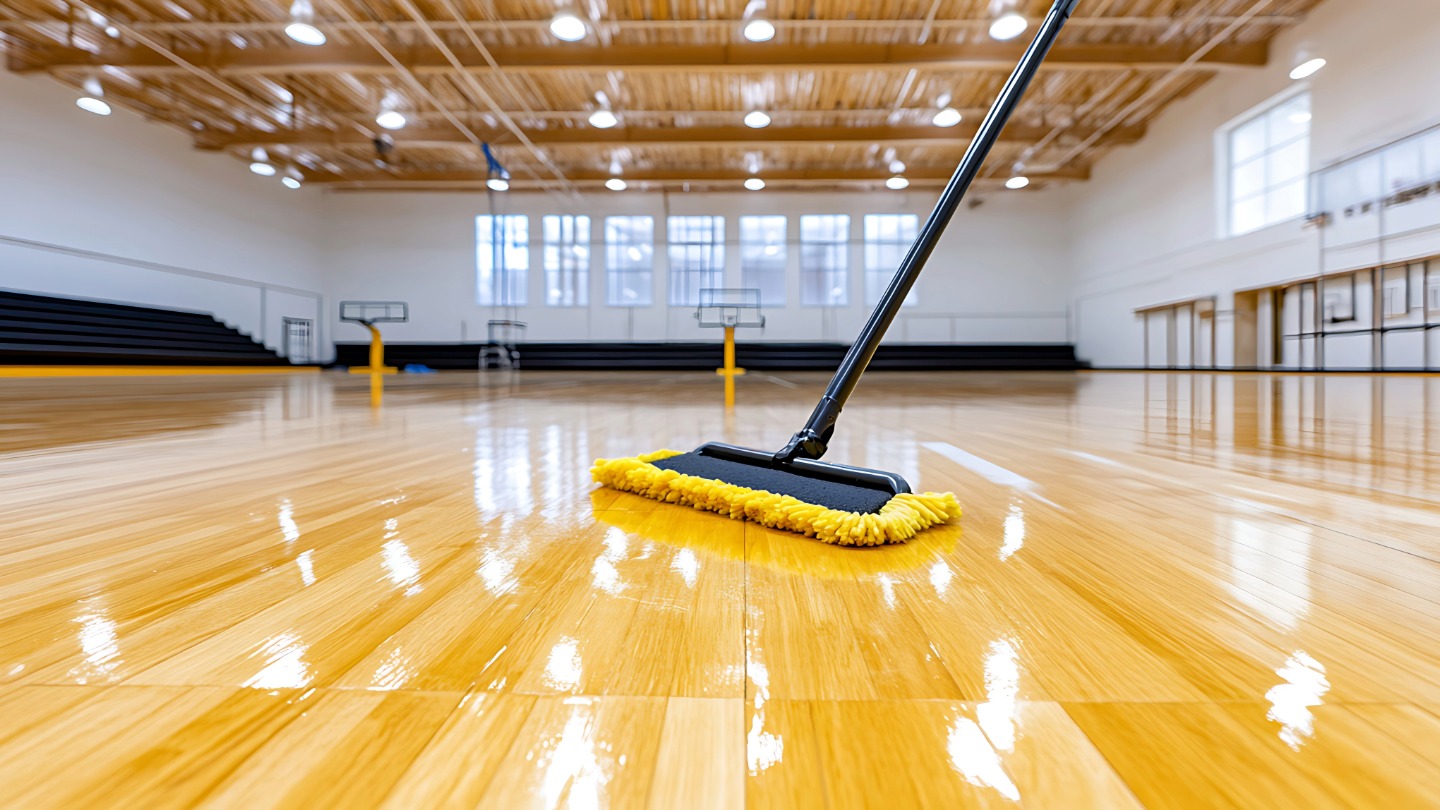
Getting your court floors looking great again can be a big job, and dealing with all the dust from sanding is often a real headache. But what if you could sand without making a huge mess? This guide will show you how to use Dust-Free Sanding Techniques to get a smooth, clean finish on your court resurfacing project, making the whole process much easier and cleaner. We’ll cover everything from getting your area ready to the best ways to use your tools for a top-notch result.
Key Takeaways
- Always clear your work area completely before you start sanding. Make sure to move everything out of the way and sweep up.
- Use the right tools. A good sander and a dust extraction unit are a must for keeping things clean.
- Move your sander in diagonal and crisscross patterns. This helps make sure you sand evenly and don’t leave marks.
- Change your sandpaper when it starts to wear out. Trying to use old sandpaper just makes the job harder and gives a bad finish.
- For tricky spots like corners, it’s okay to switch to hand sanding. Sometimes, a bit of old-fashioned effort is best for those tight areas.
.
Preparing Your Space for Dust-Free Sanding
Before you even think about firing up that sander, getting your space prepped is absolutely key. Skimping on this step is a recipe for disaster, trust me. You’ll end up with dust everywhere, damaged belongings, and a sanding job that looks like it was done by a toddler. So, let’s get it right from the start.
Clearing the Area Thoroughly
First things first: empty the room. I mean completely empty. Get rid of all furniture, rugs, curtains – everything that isn’t nailed down (and even some things that are!). This isn’t just about protecting your stuff from dust; it’s about giving yourself enough room to manoeuvre the sander properly. You don’t want to be bumping into things or trying to squeeze into tight corners. A clear space means a clear mind and a better sanding job. Plus, it makes the clean-up afterwards a whole lot easier. Think of it as a blank canvas ready for your masterpiece. Don’t forget to remove any old floor coverings, such as carpets or rugs, to expose the bare floor.
Securing Loose Floorboards
Right, now for the nitty-gritty. Walk around the room and check for any loose floorboards. These are the enemy of a smooth sanding job. If you find any, nail them down securely. Make sure the nail heads are flush with the surface of the wood, or even better, slightly below. You don’t want to be catching the sander on them and causing damage. Use a hammer and nail punch to gently drive any protruding nails below the surface level. This is also a good time to check for any protruding nails or staples. Get rid of them! A flat, secure surface is what we’re aiming for. This proactive approach is essential for achieving the desired results and maintaining the integrity of your floors.
Protecting Adjacent Surfaces
Okay, so the room is empty and the floorboards are secure. Now it’s time to think about protecting everything else. Even with dust-free sanding equipment, some dust is inevitable. So, cover anything that you can’t move – like built-in cabinets or door frames – with plastic sheeting. Tape it down securely to prevent dust from getting underneath. Pay particular attention to doorways and any openings to other rooms. You don’t want dust spreading throughout the house. A little bit of prevention now will save you a whole lot of cleaning later.
Preparing your space properly is not just about protecting your belongings; it’s about creating a safe and efficient working environment. By taking the time to clear the area, secure loose floorboards, and protect adjacent surfaces, you’re setting yourself up for a successful dust-free sanding project.
Here’s a quick checklist to make sure you’ve covered everything:
- Remove all furniture and belongings from the room.
- Secure any loose floorboards or protruding nails.
- Cover any immovable items with plastic sheeting.
- Seal off doorways and openings to other rooms.
.
Essential Equipment for Dust-Free Sanding Techniques
Getting the right kit together is half the battle when it comes to dust-free sanding. You can’t just grab any old sander and hope for the best. It’s about choosing the right tools that work together to minimise dust and give you a great finish. Let’s have a look at what you’ll need.
Selecting the Right Sander
Choosing the correct sander is vital for effective dust extraction. There are a few types to consider, each with its strengths. For large areas, a drum sander is your go-to, but for edges and corners, you’ll need an edge sander. Orbital sanders are great for finer work and getting a smooth finish. Make sure your sander has a port for connecting to a mobile extraction unit – this is where the dust-free magic happens!
Utilising Mobile Extraction Units
These units are the unsung heroes of dust-free sanding. They’re basically powerful vacuums that attach directly to your sander, sucking up dust as you work. Look for a unit with a HEPA philtre to capture even the finest particles. A good extraction unit will not only keep your workspace clean but also protect your lungs. It’s an investment in your health and the quality of your finish.
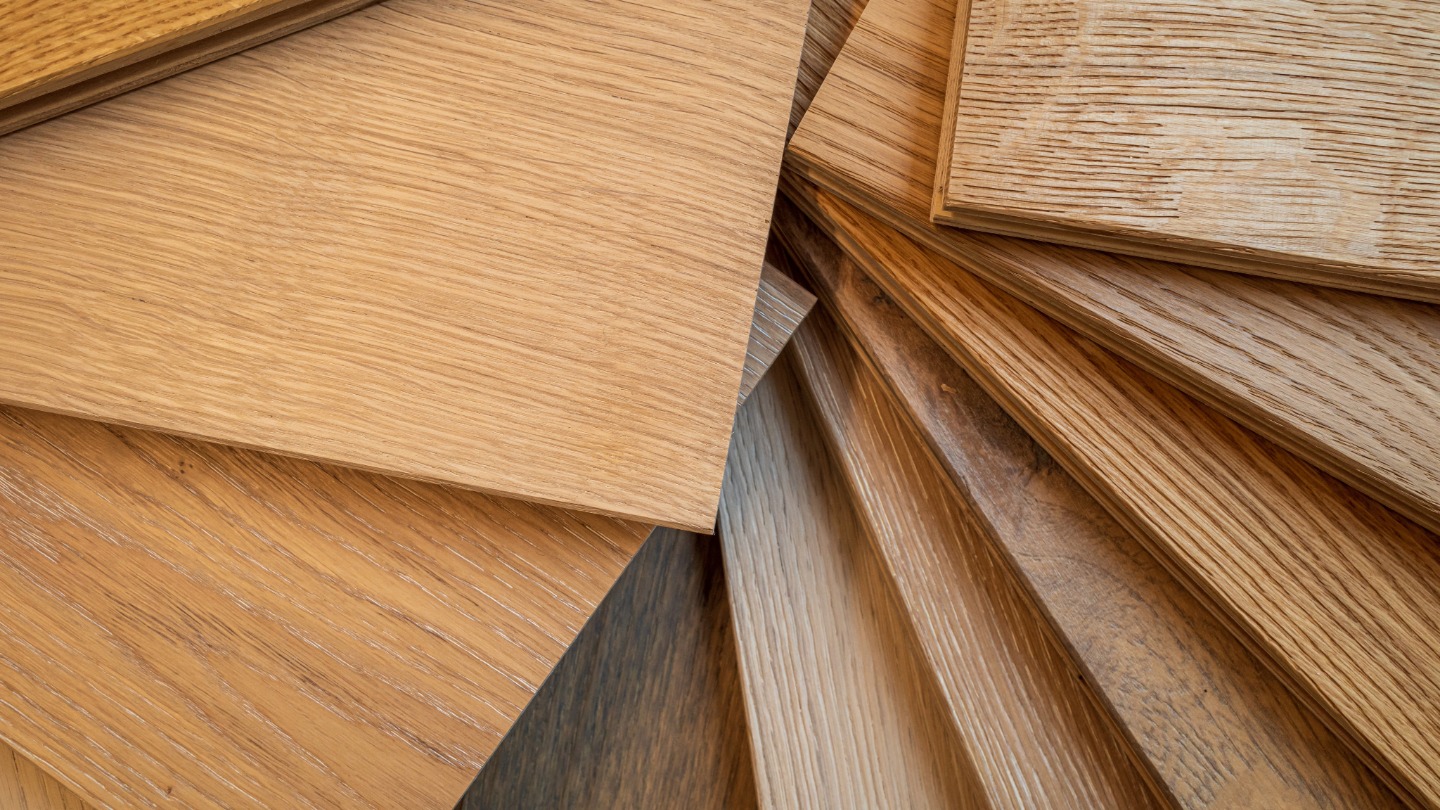
Choosing Appropriate Sandpaper Grits
Sandpaper isn’t just sandpaper; it comes in different grits, each designed for a specific job. You’ll typically start with a coarser grit to remove old finishes and imperfections, then gradually move to finer grits to smooth the surface. Here’s a rough guide:
- 40-60 grit: For removing old finishes and levelling uneven surfaces.
- 80-120 grit: For general sanding and removing scratches.
- 150-220 grit: For fine sanding and preparing for finishing.
.
Remember to change your sandpaper regularly. Worn sandpaper won’t cut effectively and can leave swirl marks. It’s a false economy to try and squeeze every last bit of life out of a sheet.
Mastering Dust-Free Sanding Techniques
Dust-free sanding isn’t just about keeping things tidy; it’s about achieving a superior finish and protecting your health. It’s a skill that requires a bit of finesse and understanding of the tools and materials involved. Let’s get into the nitty-gritty.
Employing Diagonal and Crisscross Patterns
When sanding, avoid simply going back and forth in straight lines. Instead, use a diagonal or crisscross pattern. This helps to prevent the creation of noticeable lines or grooves, ensuring a more even removal of material. Think of it like mowing a lawn – overlapping passes give the best results. This approach is especially useful when you’re doing DIY floor sanding and want to achieve a professional look.
Maintaining Even Pressure and Movement
Consistency is key. Applying uneven pressure can lead to dips and hollows in the surface. Keep the sander moving at a steady pace, and avoid dwelling in one spot for too long. It’s a bit like painting – you want to apply a uniform coat. Too much pressure in one area, and you’ll end up with an uneven finish.
Feathering Edges for Seamless Transitions
Feathering the edges is crucial for creating a smooth transition between sanded and unsanded areas. As you approach the edge of a section, gradually lift the sander to reduce the pressure. This blends the two areas together, preventing a harsh line. It’s a subtle technique, but it makes a big difference in the final result. Think of it as blending colours on a canvas – you want a gradual change, not a sudden stop.
Dust-free sanding is a game changer. It keeps the workspace clean, which means you can see what you’re doing more clearly. Plus, it’s much better for your lungs. Investing in the right equipment and learning these techniques is well worth the effort.
Advanced Dust-Free Sanding Strategies
So, you’re getting serious about dust-free sanding? Good. It’s not just about slapping some sandpaper on a machine and hoping for the best. It’s about strategy, planning, and knowing when to switch gears. Let’s get into some advanced techniques to really nail that perfect finish.
Initial Sanding for Surface Preparation
Think of this as your foundation. The initial sanding is where you remove the old finish, level out imperfections, and get the surface ready for refinement. It’s tempting to skip this step or rush through it, but trust me, it’s worth the time. Use a coarser grit sandpaper to start, something around 60-80 grit should do the trick for most floors. Remember to overlap your passes slightly to avoid leaving any ridges. This is also the time to address any major issues like cupping or warping. For sports hall floor refurbishment sports hall floor refurbishment is a great option.
Precision Edge Sanding
Edges are tricky. They’re where the walls meet the floor, where the skirting boards sit, and where dust loves to accumulate. An orbital sander is great, but it can’t get right into those corners. That’s where an edge sander comes in. These machines are designed to get right up against the wall, allowing you to blend the edges seamlessly with the rest of the floor.
Here’s a few things to keep in mind:
- Use the same grit sandpaper as you did for the initial sanding.
- Keep the sander moving to avoid burning the wood.
- Pay extra attention to corners, using a detail sander or hand sanding if necessary.
.
Intermediate Sanding for Refinement
Once you’ve done the initial sanding and tackled the edges, it’s time to refine the surface. This is where you start to smooth out any remaining imperfections and prepare the floor for the final finishing coats. Switch to a finer grit sandpaper, something around 100-120 grit. This step is all about patience and attention to detail.
Take your time, overlap your passes, and inspect the floor frequently. You’re aiming for a smooth, even surface that’s free of scratches and swirl marks.
Consider these points:
- Vacuum the floor thoroughly between each sanding pass to remove any dust or debris. This will help prevent scratches and ensure a smoother finish.
- Check your sanding techniques regularly. Replace the sandpaper as soon as it starts to lose its effectiveness. Worn sandpaper will only create more dust and won’t give you the smooth finish you’re after.
- Don’t apply too much pressure to the sander. Let the machine do the work. Applying too much pressure can cause the sandpaper to clog and create uneven sanding marks.
.
Optimising Sandpaper Usage for Dust-Free Results
Dust-free sanding isn’t just about the equipment; it’s also about how you use your sandpaper. Getting the most out of each sheet not only saves money but also contributes to a better finish and a cleaner working environment. It’s a bit like making a good cup of tea – the right ingredients and technique make all the difference.
Understanding Grit Progression
Think of sandpaper grit as a journey from rough to smooth. You wouldn’t start polishing your car with a scouring pad, would you? Similarly, begin with a coarser grit to remove old finishes and imperfections, then gradually move to finer grits. This step-by-step approach is key to achieving a flawless surface. For example, you might start with 40-grit to remove old varnish, then move to 80-grit, 120-grit, and finally 180 or 220-grit for a super smooth finish. It’s all about finesse.
Knowing When to Change Sandpaper
Sandpaper doesn’t last forever. Knowing when to swap out a worn sheet is crucial. If you notice the sander isn’t removing material as quickly, or if the sandpaper looks clogged or torn, it’s time for a change. Continuing to use dull sandpaper will only waste time and effort, and could even damage the surface you’re working on. It’s like trying to cut bread with a butter knife – frustrating and ineffective. You can use deep cleaning sports hall floors to keep the area clean.
Periodic Pad Cleaning for Efficiency
Dust extraction systems do a great job, but sandpaper pads can still get clogged with dust and debris. This reduces their effectiveness and can lead to uneven sanding. Here’s how to keep your pads in tip-top shape:
- Tap it: Gently tap the sander (switched off, of course!) to dislodge loose dust.
- Use a cleaning stick: A rubber sanding block or abrasive cleaning stick can remove stubborn build-up.
- Vacuum it: Use a vacuum cleaner with a brush attachment to clean the pad surface.
.
Keeping your sandpaper clean is a simple way to extend its life and maintain consistent sanding performance. It’s a small effort that makes a big difference to the final result.
Addressing Challenging Areas with Dust-Free Sanding

Dust-free sanding is great, but it can get tricky when you’re dealing with those awkward spots. You know, the ones where the big sander just won’t fit. But don’t worry, there are ways to get around it and still keep the dust down. It’s all about being a bit clever and using the right techniques.
Navigating Tight Corners and Edges
Corners and edges are the bane of any sanding job. The big sander just can’t get in there properly. For these areas, you’ll need to switch to smaller tools or even do some hand sanding. An edge sander is your best bet for getting close to the walls, but even that might not be enough for really tight spots.
Applying Gentle Pressure in Confined Spaces
When you’re working in tight spots, it’s easy to go overboard with the pressure. But that’s the last thing you want to do. Applying too much pressure can cause uneven sanding and even damage the wood. Instead, use a gentle touch and let the sandpaper do the work. Think of it like you’re coaxing the wood, not forcing it.
Hand Sanding for Intricate Details
Sometimes, there’s just no substitute for hand sanding. For really intricate details or hard-to-reach areas, it’s the only way to get a truly flawless finish. Use a sanding block or wrap the sandpaper around a piece of wood for better control. And remember to use the same grit sandpaper as you’ve been using with the sander to maintain sports arena floors. It might take a bit longer, but the results will be worth it.
Don’t rush the process. Take your time and pay attention to the details. The goal is to create a smooth, even surface that’s ready for finishing. And remember, dust extraction is still important even when you’re hand sanding. Use a vacuum to collect the dust as you go, or wear a dust mask to protect yourself.
Ensuring a Flawless Finish with Dust-Free Sanding
Dust-free sanding isn’t just about removing material; it’s about preparing the surface for a beautiful and lasting finish. The final steps are crucial to achieving that professional look. Let’s get into it.
Wiping Down Residual Sawdust
Even with the best dust extraction, some residual sawdust is inevitable. Thoroughly wiping down all surfaces is essential. Use a tack cloth or a microfibre cloth dampened with mineral spirits to pick up any remaining dust particles. Don’t forget to clean walls, skirting boards, and any other surfaces in the immediate vicinity, as dust can settle everywhere. Multiple passes might be needed to ensure every trace of dust is gone. This step is vital for preventing imperfections in the final finish.
Inspecting for Imperfections
Once the sawdust is removed, take a good look at the sanded surface. Use a strong light source to highlight any imperfections, such as scratches, uneven areas, or swirl marks. Run your hand over the surface to feel for any inconsistencies. Address any issues by spot-sanding with a fine-grit sandpaper or using a scraper to level out imperfections. It’s better to catch these problems now than to discover them after the finish has been applied. This is where attention to detail really pays off. You might need to use squash court refurbishment techniques to fix any major issues.
Preparing for Final Finishing
Before applying the final finish, give the surface one last once-over. Vacuum the area again to remove any dust that may have settled during the inspection and spot-sanding process. Ensure the room is well-ventilated and the temperature is within the recommended range for the finish you’re using. Finally, wipe down the surface one last time with a tack cloth to ensure it’s completely clean and ready to receive the finish. This meticulous preparation will help ensure a smooth, even, and durable final result.
Taking the time to properly prepare for the final finish is an investment in the longevity and appearance of your project. Rushing this stage can lead to disappointing results and require additional work to correct. Patience and attention to detail are key to achieving a flawless finish.
Want to get a super smooth finish without all the mess? Dust-free sanding is the way to go! It makes sure your surfaces look great and keeps your workspace tidy. Find out more about how we can help you achieve a perfect finish on our website.
Conclusion: Getting That Perfect Finish
So, there you have it. Getting a court surface just right, especially when it comes to sanding without making a huge dusty mess, really comes down to a few simple things. It’s about picking the right tools for the job, using those tools the way they’re meant to be used, and making sure you’re always thinking about safety. If you keep these ideas in mind, you’ll find that getting a smooth, clean surface isn’t as hard as it might seem. It just takes a bit of care and attention to detail. And when you’re done, you’ll have a court that looks great and lasts a long time.
Schedule sanding → Floor Refurbishment
Frequently Asked Questions
What’s the easiest way to sand a floor?
The simplest way to sand a floor is by using a floor sander that has a belt and a special vacuum system. This helps you sand well and keeps dust down.
Which sander should I use for a DIY floor sanding project?
For DIY floor sanding, you should use a drum sander and an edge sander. These tools are great for taking off old finishes and making the floor smooth.
Should I fill gaps in floorboards before sanding?
Yes, it’s a good idea to fill any gaps in your floorboards before you start sanding. This stops dust from getting stuck in the gaps and makes the floor look better.
What kind of sandpaper should I use for floor sanding?
You should use sandpaper with different levels of roughness. Start with rougher paper to remove old layers, then switch to finer paper to make the floor super smooth.
How long does it take to sand a wooden floor?
The time it takes depends on how big the room is and how much work the floor needs. A small room might take a day, but a bigger one could take longer.
How do I know if my floor needs sanding?
You can tell if a floor needs sanding if it looks dull, has scratches, or if the old finish is peeling off. Sanding can make it look new again.